Creating a New Project
This is what you see when you start Guikachu. The toolbar buttons and menus should be self-explanatory. The Add button is used to create new resources. But before that, let's set up our example project first. Double-click on the topmost item in the list of resources that is labeled Application.

This editor window allows you to enter information that applies to your project as a whole. Be sure to only fill in the Vendor ID field if you have a unique ID registered at PalmOS.com. Setting the Target machine field is necessary to fine-tune some aspects of Guikachu to the platform you are developing for, like the size and aspect ratio of the handheld's screen. After it's filled in, close the application editor and return to the main window.
Click here for details on the Application resource
Adding a Menu
The application we are writing will have a main window with a menu bar, so let's start with that. Click on the Add button in the tool bar or the File menu, and the Add new component dialog pops up:

Later, when you're writing your program, you will have to access the resources you create. Type in the Resource ID field the ID that you want to use. You can also leave it empty, in which case Guikachu will create a suitable ID for you.
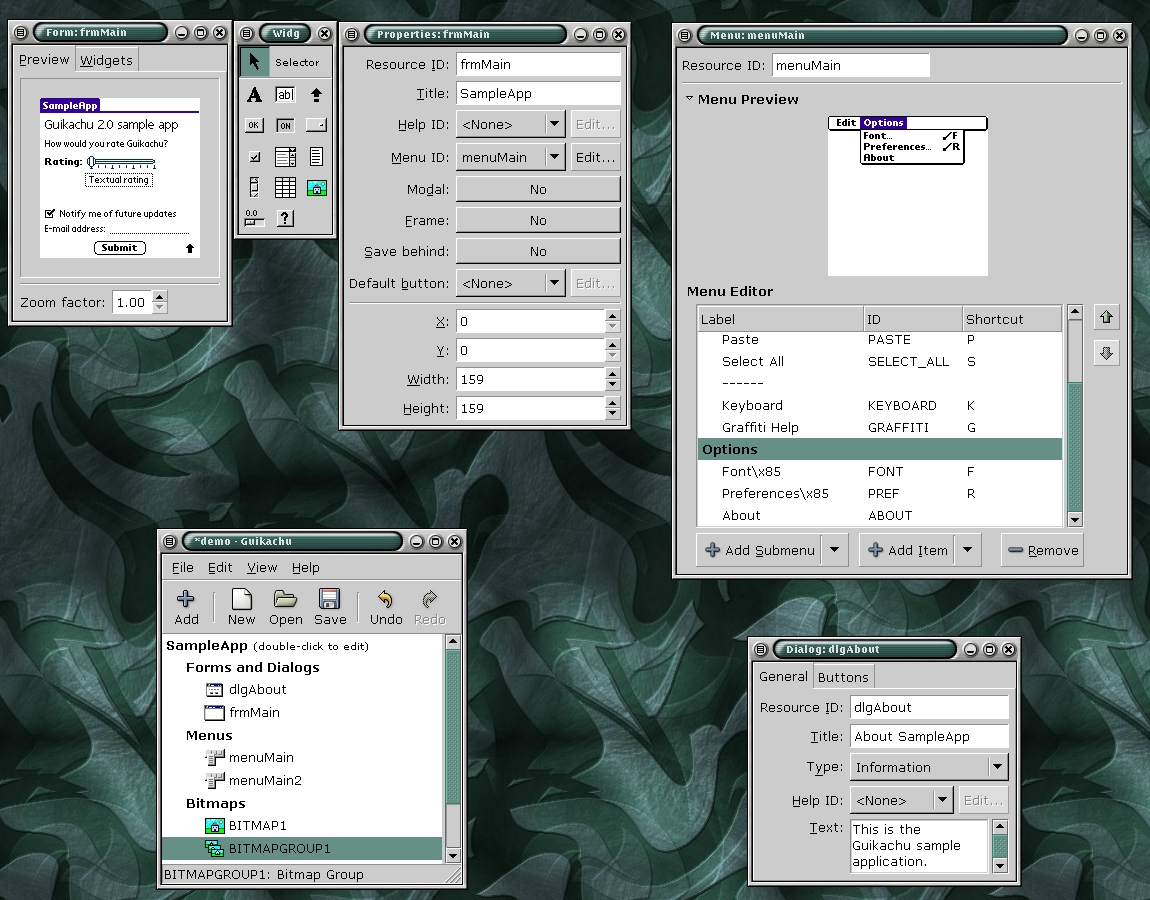
After the menu is created, it is listed in the main window. Double-click on it to open its editor window.
To populate the menu, you first have to create sub-menus, then menu items. Both are created by right-clicking on the main area. Then click on the cells in the Label, ID or Shortcut columns to start editing. For this demo application, we'll create two submenus, with one item in each one. The result should look like this:

Click here for details on the Menu Editor
Creating a Form
The main user interfaces of PalmOS applications are so-called Forms, which is basically the PalmOS jargon for windows. For this demo's purposes, we'll create a form with a big button that should pop up a message when tapped by the user. Start by adding a new Form resource to our project. Double-clicking it will pop up two new windows: the Form Editor, and the Widget Palette.

The Widget Palette allows you to place widgets (user interface elements) on the form. Before that, however, let's click on the title of the form (the rectangular area that says FORM1) to set up the form itself.

On the above screenshot, I've changed the form's title to something more informative than FORM1, and also set the menu of the form. You can click on the Edit... button next to the Menu ID dropdown list to change the contents of the associated menu.
Now let's create our button. Click on the icon with the small OK button in the palette, then click somewhere on the green area that's the form's background. The button will be created there, like this:

Of course, since this button is going to be the only UI element, we should probably make it larger, and more centered. Click on the button, and drag the small white grips with the mouse to resize it. You can also drag the button itself to change its position.

You can also change the appearance of the button by using its property editor:


Click here for details on the Form Editor
The Dialog Window
Dialog windows can be thought of as special-purpose forms. You don't have to manually design dialogs, all you need to do is provide the text displayed, and the name of the buttons. We'll create an About dialog to show from the menu, or when the user taps our only button.


Writing the Code
The user interface of our application is done, all you're going to need now is writing the code to make it work. Click on the Save button in the toolbar or the File menu to create a .guikachu file storing the resources of the demo application.
Since the scope of this tutorial is the usage of Guikachu, and not coding on the PalmOS platform, we'll cheat a bit here and use the guikachu2c.py script to create most of the code. This way, you'll only have to write the following event handlers:
Boolean widget_BUTTON1_ctlEnter_cb ()
  {
    /* Pop up the About dialog */
    FrmAlert (DIALOG1);
    return true;
  }

  Boolean MENU1_MENU_NOTHING_activate_cb ()
  {
    /* We'll do nothing here, and thus return false */
    return false;
  }

  Boolean MENU1_MENU_ABOUT_activate_cb ()
  {
    FrmAlert (DIALOG1);
    return true;
  }
The full source code is available here; apart from the lines shown above, most of it is boilerplate. A tarball containing the .guikachu file and all the source files is also available here. The Guikachu source distribution contains other, more detailed sample programs.
As a conclusion, here's a screenshot showing POSE running our program:
